Pages

Sunday, January 31, 2016

Paper Sweeties February 2016 Inspiration Challenge


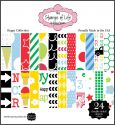
Hi, all!  It's time for another challenge at Paper Sweeties--and we have a FUN wintry, yet girly, inspiration for your crafting mojo this time around.  Check it out...


I decided to incorporate the colors and fun snowman element in my card.  I also used some of the *NEWEST* products from the January release, too!  Take a peek...


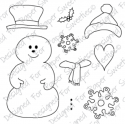
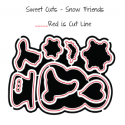
This fun snowman was made using the Snow Friends stamp set and Snow Friends Sweet Cuts dies.  I used some polka dot paper, white Glaze gel pen, and Stickles to add some shine and texture to the snowman's accessories. A few snowflakes decked out with some Raspberry Sequins were added to tie in the snow theme, too.


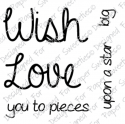
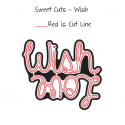
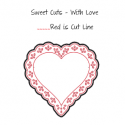
The sentiment was made using the Wish stamp set and Wish Sweet Cuts dies.  These stamps and dies were layered onto papers cut using the *NEW* With Love Sweet Cuts dies.  I used glitter paper for shine, then added a few hearts dies stamped and die cut with the Snow Friends set and Snow Friends Sweet Cuts dies and a small paper flower for embellishment.


All in all, I think this turned out super cute, and has already been given to a sweet friend who has helped me out a LOT the past month!  I hope you like my creation--I would love to hear your thoughts in the comments below!


That's all for me, friends!  Thank you SO MUCH for stopping by!  I hope you come and join in the fun with us this month, and don't forget to check out the other DT makes!

Here's you list~

I'll be back later this month with some more Paper Sweeties creations!
Our release is a bit different this month, so check out the Paper Sweeties blog for details!

HUGS and happy stamping, friends! :)

blog sig 2015-16 photo Signature_1.png

Project supplies:

Thursday, January 28, 2016

Red Rubber Designs: Music


I'm on the Red Rubber Designs blog for one last time today sharing a shabby chic card with a music theme!  Check it out HERE, then go grab the Music Washes rubber stamp from the Red Rubber Designs store to recreate it yourself! :)  HUGS and happy stamping, friends!

blog sig 2015-16 photo Signature_1.png

Birthday Shaker


Hello, all!  Classes have started again for me, so, unfortunately, I am going to be seeing less of you all.  BUT, I still have lots of fun cards to share with you, they just won't be as frequent come February. :)  Today I have a card that was SUPER fun to make, and it uses some totally fabulous products from The Stamps of Life!  Check it out...


I used the *NEW* Happy Birthday Circle Dies to create a fun shaker for my focal point and sentiment combo.  I used white cardstock as the color of choice so that I could add in lots of fun colored sequins.  


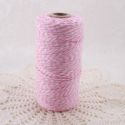
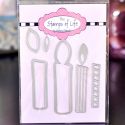
To finish off the card, I added a layered die cut candle that was made using the Candle Club Die Set.  I added some ribbon, baker's twine, and a fun polka dot bow to finish off the card.  


I think this turned out super fun!  I know there are a few bows, but this card was created to be used for a man's birthday.  Hopefully the bows are reminiscent of gift wrapping. ;)  What do you think?  I'd love to hear your thoughts in the comments below!


I'd like to enter this into these fabulous challenges~


Thank you so much for stopping by today, friends!  I hope you take some time to join in with these fabulous challenges!  I'll be back later with more paper craft creations for your viewing pleasure.  Until then, HUGS and happy stamping! :)

blog sig 2015-16 photo Signature_1.png

Project supplies:

Monday, January 25, 2016

Great Impressions: It Would Stink...


Happy Monday, friends!  I'm back with another creation that uses some super fun stamps from the Great Impressions online store.  Today I'm sharing another Valentine with a cute critter and punny sentiment--SQUEE!  Take a peek...


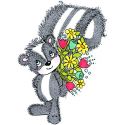
I added different washi tape strips to the card base before adding the image and sentiment.  I stamped the image, F606 Skunk With Flowers, onto white cardstock, then colored in the flowers, eyes, and ears with Sakura glitter gel pens.  I then fussy cut him out before adding it to the card base with dimensional foam adhesive.


I stamped the sentiment, D458 It Would Stink, onto black cardstock and heat embossed it with white embossing powder.  I cut the end to look like a banner.  I added it behind the image, but with dimensional foam to keep the layered look.


The last thing to do was add some rhinestones and sequins for added texture and shine.  I think this is super darling--I hope you do, too!  Please leave me a comment below and let me know what you think!


That's all for me today, friends.  THANK YOU so much for stopping by to take a peek at my card!  I also would love for you to come and join our monthly challenge!  If you use a stamp from the Great Impressions online store, please link it up in our Customer Gallery, too!  Until next time, HUGS and happy stamping, friends! :)

blog sig 2015-16 photo Signature_1.png

Project supplies:
Friday, January 22, 2016

Inspired By Stamping: Valentine Countdown

Hi, all!  I am SUPER excited for my post today!  As soon as I saw the *NEW* My Valentine's stamp set from the Inspired By Stamping store, I just KNEW that I'd need to make a Valentine countdown frame with it!  It was really a pretty quick project because the stamps do most of the work for you!  I'll narrate how I made this project, then do a recap list at the end.  Take a peek at my completed project before I take you step by step...


Isn't that just super fun?!  I went with a traditional Valentine color scheme--black, red, white, and gold for shine and elegance.  The first step in creating this project is to find a frame you want to use.  I had one that was in serious need of an upgrade.  It was more of a shadowbox type frame.  


I'm not sure if you can tell or not, but there is a gold mat that was inside the frame with an oval opening.  I added some patterned paper to fill in that gap.  I then added three strips of ribbon across the frame to attach my tags.


The tags were super fun to make!  I used washi tapes, red glittery hearts, glittery chipboard arrows, gold stickers, flowers, other miscellaneous embellishments, and the My Valentine's set for the tags themselves.  


To attach the tags, I utilized hair clips.  I just hot glued some flowers to the tops and then threaded them through the hole.  You could also use tiny clothespins for this.  Those were actually my first choice, but I couldn't find the ones I KNOW I have somewhere in my craft area. ;)  


I am SO happy with how this project turned out!  I hope you like it, too!  I'd love for you to let me know your thoughts in the comments below!  And now, like I stated above, here's a quick list of steps to make this project:
  1. Select frame.  Add patterned paper and ribbon.
  2. Make tags using the My Valentine's set, flowers, and other desired embellishments.
  3. Make clips to hold tags in place temporarily by hot gluing flowers onto the tops of hair clips.
  4. Attach tags to frame.

Thank you so much for stopping by today, friends!  That's all I have for you today, but I'll be back soon with more inspiration using fabulous products from the Inspired By Stamping online store.  Until then, HUGS and happy stamping, friends! :)


blog sig 2015-16 photo Signature_1.png

Project supplies: