Showing posts with label tag. Show all posts

Monday, June 22, 2020

CTMH Haul + Coloring on Kraft Cardstock + GIVEAWAY!


Hello, friends! Welcome back! I've got a *NEW* video on my YouTube channel where I share a recent CTMH haul and show you how to color on kraft cardstock! Take a peek at the tag I made...


All the details can be found in the video! I LOVE the way this tag turned out. What do YOU think? I would really enjoy reading your thoughts in the comments below!


Thanks so much for stopping by today, my friends! I hope you hop over to view my video and consider subscribing! If you do, leave a comment for YOUR chance to win the set I used in this video! Until next time, HUGS and happy stamping, friends!


Tuesday, October 25, 2016

Trick or Treat!


Hi, friends!  It's been a long time since I stopped to create just because, but I had a fun idea and needed to roll with it!  It ended up as a funky Halloween tag--take a peek!


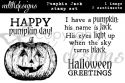
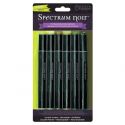
I started by recoloring the image from the Pumpkin Jack digital stamp set from MHKDesigns.  I then printed it onto white cardstock, colored it in with Spectrum Noir markers, and fussy cut it out.  I added some glitter, leaves punched from the Trick or Treat digital paper pack, and a sweet tiny flower handmade and sent to me by my friend Cohenna!


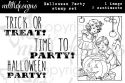
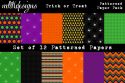
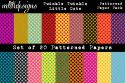
I added some torn black cardstock, a patterned paper banner made from paper from the Twinkle Twinkle Little Dots digital paper pack, another strip of paper from the Trick or Treat digital paper pack, and a sentiment from the Halloween Party digital stamp set.  I chose to keep the edges clean so that the different colors would POP!


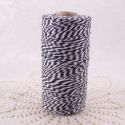
Some white seam binding ribbon, black and white baker's twine, and a purple button finish off this fun tag.  I really adore the way it turned out, and I hope you like it, too!  I would love to hear your thoughts in the comments below!


Thanks for stopping by today, friends!  That's all I have for now, but I'll be back soon with more paper crafted projects to share. :)  I hope you all have a Happy Halloween on Monday, too!  Until next time, HUGS and happy {digital} stamping! :)

 photo Signature copy_2.png

Project supplies:
Monday, March 7, 2016

Great Impressions: Jelly Bean Tag


Hi, friends!  It's time for me to share another creation using super fabulous stamps from the Great Impressions online store!  Today I have a fun jelly bean tag to share with you--perfect for those Easter treat bags!  Take a peek...


This tag uses E712 Jelly Bean Jar and B252 Border of Jelly Beans for my images.  I colored them in with Glaze and glitter gel pens from Sakura.  I added a few rhinestone flowers to tie in the flowers from the jar, as well.  Some liquid pearls were added for flower centers. :)


My sentiment is E890 Life Is Sweeter and was added to the top of the tag.  I just ADORE the fun font of this sentiment--it is SUPER darling!


Some white ribbon and cording was added to the corner of the tag for easy addition to any treat.  I hope you like my tag today--please leave me a comment below to let me know what you think!


That's all for me today, friends.  THANK YOU so much for stopping by to take a peek at my card!  I also would love for you to come and join our monthly challenge!  If you use a stamp from the Great Impressions online store, please link it up in our Customer Gallery, too!  Until next time, HUGS and happy stamping, friends! :)

blog sig 2015-16 photo Signature_1.png

Friday, February 12, 2016

Paper Sweeties February 2016 Release Sneak Peeks!


Hey, all!  It's time for another Paper Sweeties release!  We've got a fun new stamp set and coordinating Sweet Cuts dies to go with it--you will love it!  Today I've made a fun springtime tag to share with you.  Take a peek...


I used the *NEW* Thinking of You stamp set and Thinking of You Sweet Cuts dies for my tag.  The label was stamped, then die cut, and a sentiment added from the Snow Time Add-On: Sweet Treats set.  I added a die cut flower and some grape sequins


For some added depth, I layered the blue piece onto a die cut pink piece.  I added some yellow centers to the flower sequins, then tied in the hints of yellow with some yellow satin ribbon.  I think it's cute, and I hope you agree!  Please do leave a comment below and let me know what you think!


Thanks so much for stopping by today, friends!  I hope you hop over to the Paper Sweeties store and grab these goodies!  For more inspiration, make sure to check out what the other DT gals have made this month!

Here's your list~

And Here's What's New!

Don't forget about the monthly card kit!
papersweeties-february 2016 kit(1)

I'll be back next month with more inspiration using
products from the Paper Sweeties online boutique!

Until then, HUGS and happy stamping, friends! :)

blog sig 2015-16 photo Signature_1.png

Project supplies:
Friday, January 22, 2016

Inspired By Stamping: Valentine Countdown


Hi, all!  I am SUPER excited for my post today!  As soon as I saw the *NEW* My Valentine's stamp set from the Inspired By Stamping store, I just KNEW that I'd need to make a Valentine countdown frame with it!  It was really a pretty quick project because the stamps do most of the work for you!  I'll narrate how I made this project, then do a recap list at the end.  Take a peek at my completed project before I take you step by step...


Isn't that just super fun?!  I went with a traditional Valentine color scheme--black, red, white, and gold for shine and elegance.  The first step in creating this project is to find a frame you want to use.  I had one that was in serious need of an upgrade.  It was more of a shadowbox type frame.  


I'm not sure if you can tell or not, but there is a gold mat that was inside the frame with an oval opening.  I added some patterned paper to fill in that gap.  I then added three strips of ribbon across the frame to attach my tags.


The tags were super fun to make!  I used washi tapes, red glittery hearts, glittery chipboard arrows, gold stickers, flowers, other miscellaneous embellishments, and the My Valentine's set for the tags themselves.  


To attach the tags, I utilized hair clips.  I just hot glued some flowers to the tops and then threaded them through the hole.  You could also use tiny clothespins for this.  Those were actually my first choice, but I couldn't find the ones I KNOW I have somewhere in my craft area. ;)  


I am SO happy with how this project turned out!  I hope you like it, too!  I'd love for you to let me know your thoughts in the comments below!  And now, like I stated above, here's a quick list of steps to make this project:
  1. Select frame.  Add patterned paper and ribbon.
  2. Make tags using the My Valentine's set, flowers, and other desired embellishments.
  3. Make clips to hold tags in place temporarily by hot gluing flowers onto the tops of hair clips.
  4. Attach tags to frame.

Thank you so much for stopping by today, friends!  That's all I have for you today, but I'll be back soon with more inspiration using fabulous products from the Inspired By Stamping online store.  Until then, HUGS and happy stamping, friends! :)


blog sig 2015-16 photo Signature_1.png

Project supplies: