Showing posts with label crocheted trim. Show all posts

Sunday, January 3, 2016

Great Impressions: January 2016 Challenge "Lovey Dovey"


Hey, all!  It's time for another monthly challenge over at Great Impressions!  Our theme is "Lovey Dovey", and we want to see creations with a Valentine theme and/or a bird on it!  Check out my creation...


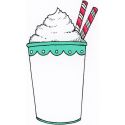
I decided to keep my card very CAS.  I used H278 Fun Coffee Cup for my image.  I stamped it directly onto the card base, paper pieced it, added some Glaze gel pan accents, and added a fun layered Valentine piece.


I decided to add my sentiment on a strip of vellum.  This one is D459 Sweetest Dreams.  I stamped it in black Staz-on ink, then stapled it to the card base.  A few enamel dots help to keep the vellum in place, too.


The last step was to add some fun papers, crocheted trim, and sequin trim to the bottom of the card.  I did this to anchor everything and add some fun texture and shine.  I LOVE the way this turned out!  I think it's so cute, and I hope you do, too!  Please leave me a comment below to let me know what you think! :)


That's all for me today, friends.  THANK YOU so much for stopping by to take a peek at my card!  I also would love for you to come and join our monthly challenge!  If you use a stamp from the Great Impressions online store, please link it up in our Customer Gallery, too!  Until next time, HUGS and happy stamping, friends! :)

blog sig 2015-16 photo Signature_1.png

Project supplies:

Monday, November 9, 2015

The 25 Days of Christmas Tags


Hi, everyone!  I'm super excited to be participating with Paper Sweeties in The 25 Days of Christmas Tags progressive hop!  There's TONS of holiday tag inspiration coming your way, and the Paper Sweeties team has got some super fun ideas for you!


I decided to go with a blue, cream, kraft, and gold color scheme for my tag.  I LOVE these colors together--I think they are so elegant!  Take a peek at my final product...


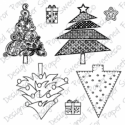
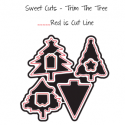
This is one of my all-time favorite Christmas tree images.  It's from the Trim the Tree set.  I stamped the image onto vellum and embossed it in gold.  I then added white Glaze gel pen to the ornaments.  I die cut it with the coordinating die from the Trim the Tree Sweet Cuts die set and added another die cut tree behind it.  I added it to my tag--on top of some gold washi tape and patterned paper.  A small gold glitter enamel star topped off this fun tree.


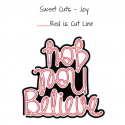
The sentiment is a die cut from the Joy Sweet Cuts die set.  I die cut it out some kraft cardstock and some gold cardstock, then layered them together and added them to the tag with a gold glitter enamel heart.  It was added over some crocheted trim.  Some gold elastic cord and a cream button were added as more of an anchor for the sentiment.


Up top, I added some sequins from the *NEW* Snowflake Sequin Mix and some Frosting Seam Binding Ribbon.  I added the ribbon through some eyelets and made it into a hanging tag.  The sequins were added to the corner over a doily quarter that was added for texture.


I am very pleased with the final product!  I'm not sure what this tag will adorn this holiday season, but I think it will be something really special! :)  What do you think?  I'd love to hear your thoughts in the comments below!


Thanks so much for stopping by, friends!  For more Paper Sweeties inspiration, check out the rest of the DT gals who are participating in this fun hop...

I'll be back soon with more Paper Sweeties inspiration for you--so stay tuned!  I hope you have lots of fun hopping around today and for the rest of this event, too!  Until next time, HUGS and happy stamping to you all! :)
blog sig 2015-16 photo Signature_1.png

Project supplies:

Tuesday, November 3, 2015

Ribbon Christmas Tree


Hello again, friends!  I'm excited to share something a little bit different today.  No card here--instead I have a fun Christmas tree made from ribbons and trims to share with you!  Check it out...


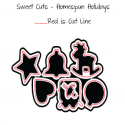
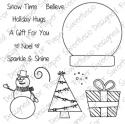
For my tree, I used a paper straw, various ribbons and trims, some buttons, pearls, gold elastic cord, and some fun products from Paper Sweeties.  The ornament tag was cut using the Homespun Holidays Sweet Cuts Dies and the sentiment is from the Snow Time stamp set.


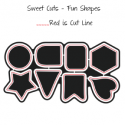
To make the star, I just added strips of gold washi tape to some cardstock.  I then die cut it using the star die from the Fun Shapes Sweet Cuts die set.  I added a button and pearl to tie in the rest of the embellishments I used on the rest of the tree.


To hold my tree, I used a wooden spool.  I covered it with some of the same ribbons and trims I used on the tree itself.  I hot glued the straw into the spool for more support.  I really LOVE the way this turned out!  I hope you think it's fun, too!  I'd love to hear your thoughts in the comments below! :)


I'm entering my ribbon tree into these fabulous challenges~


Thank you so much for stopping by to take a peek at my little tree, friends!  I hope it's inspired you to try something new!  I also hope you take a bit of time to join in the fun with these fabulous challenges!  I'll be back soon with more crafty pursuits.  Until then, HUGS and Merry stamping, all! :)

blog sig 2015-16 photo Signature_1.png

Project supplies:

Saturday, October 31, 2015

Paper Sweeties November 2015 Inspiration Challenge


Hi, all!  It's time for another monthly challenge over at Paper Sweeties, and there's some beautiful inspiration for you to use when you create!  Check it out...


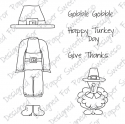
I decided to create a fun Thanksgiving card using some of the colors in this inspiration, Jake, and his cute turkey friend!  Take a peek...


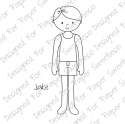
Like I said, I used Jake, the Jake Sweet Cut die, and the Gobble Gobble stamp set on this card.  I'm afraid I messed up the pilgrim outfit on Jake, but I think he still looks ok. ;)  I paper pieced them both, added some Glaze gel pen, Wink of Stella gold marker, and heat embossing for texture and shine.


The banner was made using the Birthday Banners set, the Birthday Banners Sweet Cuts dies, and some gold sequins.


The sentiment was stamped onto gold paper, and layered onto the card base along with a doily, crocheted trim, a button, and gold elastic cording.  I LOVE this card, and I hope you do, too!  Please leave me a comment below to let me know your thoughts!


Thank you so much for stopping by to take a peek!  If you'd like to see more inspiration, join the hop and check out all the other gals' creations--you will NOT be disappointed!

Here's the hop list~
Debbie Marcinkiewicz – Paper Sweeties
November Guest Designer:  Michele Henderson

I'll be back later this month with release projects!

Until then, HUGS and happy stamping, friends! :)

Wednesday, September 23, 2015

MHKDesigns: Mum's the Word


Hi, everyone!  It's time for a mini-release for MHKDesigns!  I made a few mini sets that are minimal in cost, plus I've added some papers, so my team is going to be sharing the cards and sets from the 22nd-26th.  Stay tuned for the beginning of October, too, because I am sponsoring the Hop to Stop and so I'll have 2 more sets and another paper pack to share with you on the 1st!!!

Before we get started, I have a WINNER
from yesterday's post to announce!  

The winner is...

KellyRae who said:
"What a darling set! Love the puns. My go-to eye colors for animals is blue but your green eyes and then the green accent on your sentiment gives YOUR kitty sass! My sweet sweet 11yo granddaughter is just 'getting' puns and she would definitely appreciate your clever sayings :) Thanks for the chance to win."

Please email me at mhkdesigns.etsyATgmailDOTcom 
and I will email you the set from yesterday!!!

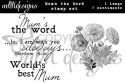
Today we're sharing the "Mum's the Word" set...

Since autumn is upon us, I was thinking fall flowers.  I automatically thought of mums...and then I decided to make it into a more versatile set with some random sentiments. :)  Take a peek at what I created with this set + the Autumnal Accents papers...


I chose to watercolor the image from Mum's the Word and then add glimmer mist for added shine.  To create the background, I wet down a paper towel, cleaned my watercolor block, then smeared the water/ink around the panel.  I think it looks so pretty!


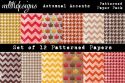
I used two different papers from the Autumnal Accents papers and then separated them with some crocheted trim.  The trim also acts as an anchor for the image.


My last step was to add some gold washi and rhinestones.  I also added a bunch of ribbons to the top of the notebook.  I really think this turned out beautifully--I hope you do, too!  Please leave me a comment below to let me know what you think!


For more inspiration using this gorgeous set, please check out the gals my team who are also showcasing this set!

Here are the links~

***GIVEAWAY ALERT***

I will be giving both of these sets to one lucky person who comments on this blog posts!  It will be randomly chosen, so everyone has a chance!  Please make sure that your email is easily found via your comment and/or Blogger profile so that I can get your winnings to you quickly! :)

Want MORE chances to win freebies?!  Join our Facebook group and comment on posts there for a chance to win FREE digital paper packs or a discount to the store! :)

Thank you SO MUCH for stopping by!  That's all for me today, friends!  I'll be back tomorrow with another new MHKDesigns set for you to check out, so stop by again then for another chance to win, too!  HUGS and happy {DIGITAL} stamping to you all! :)